Whatsapp has recently become a very popular platform for messaging, with its versatile features and functionalities. Personally for me, I use whatsapp for communication on almost everything. We have all sorts of Whatsapp groups from families, in laws, siblings, cousins, works, management, departments, and etc.
One of the limitations on Whatsapp is the limited API access. You will need to be on Whatsapp Business or some other paid services to be able to use the API to send and received message on Whatsapp from an automated system or a custom bot.
In this article, I will share a method I found that allows you to send and Receive Whatsapp messages from Node-RED using the plugin node-red-contrib-whatsapp-link, for free.
Node-Red Installation
The first step is to have Node-RED installed and running on your PC. I am using the exact same guide that I found from the office page here. Take note that my Node-RED is installed under Windows 11.
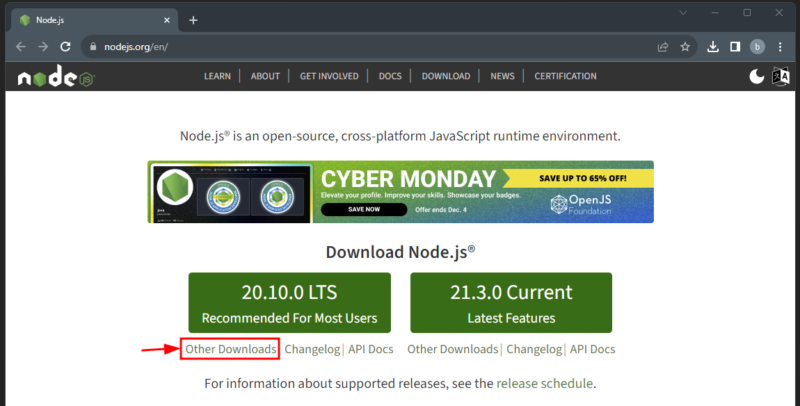
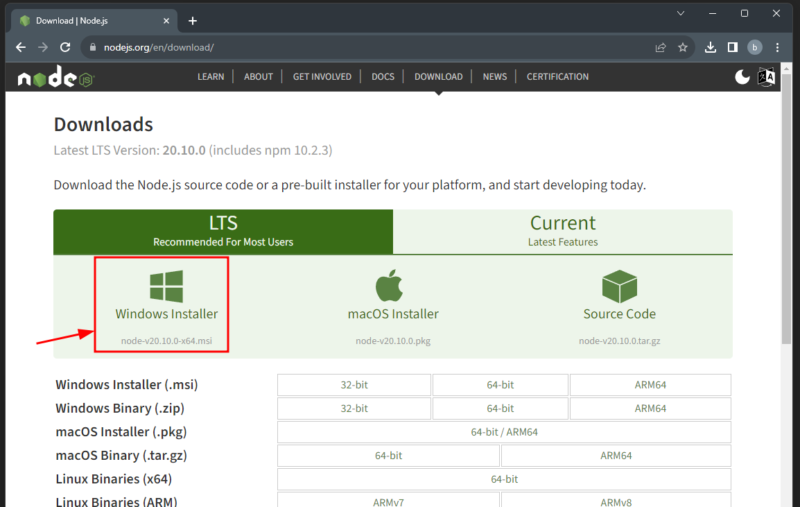
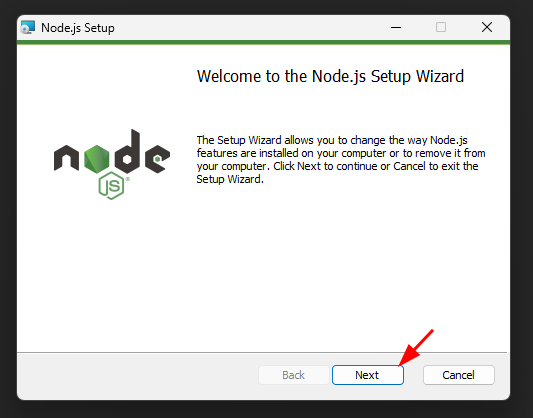
Install Node.js
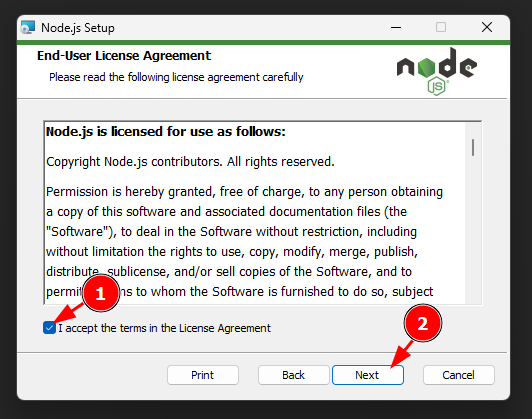
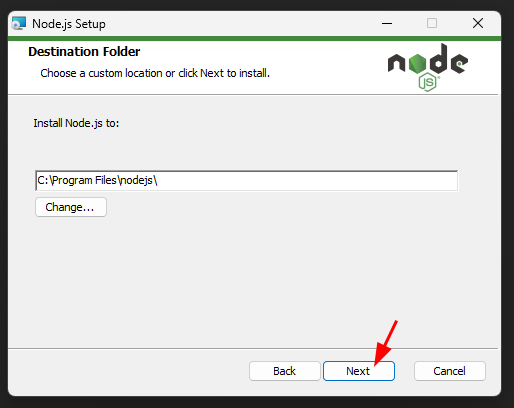
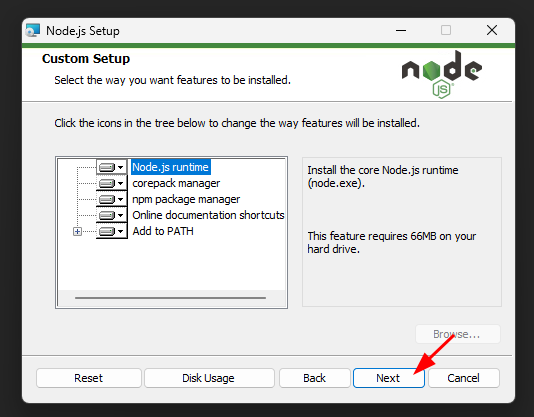
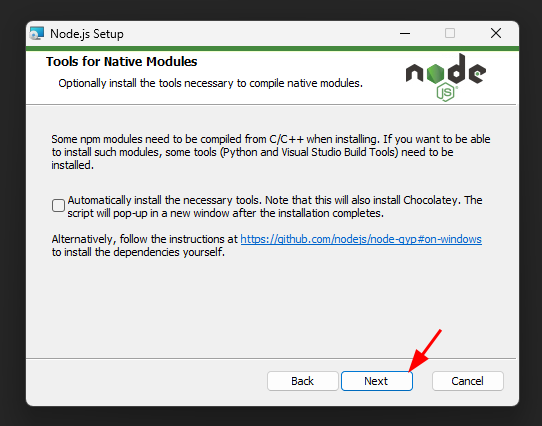
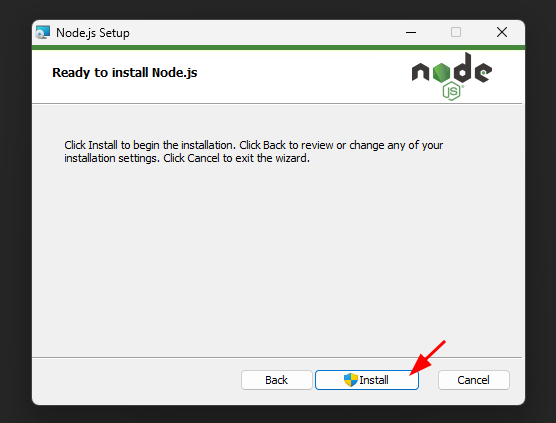
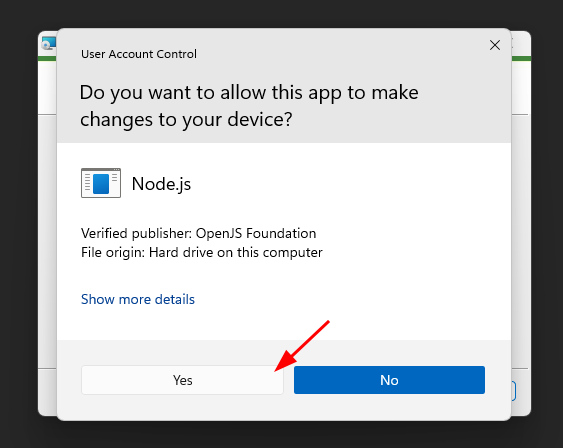
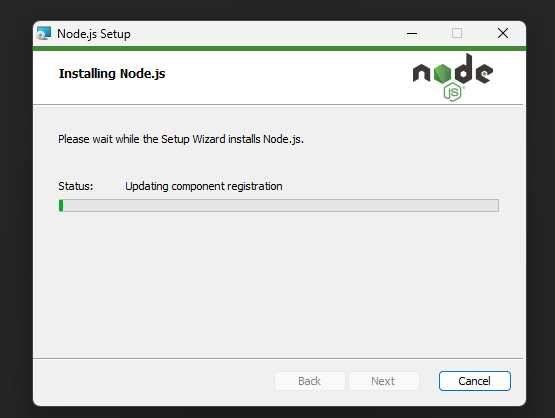
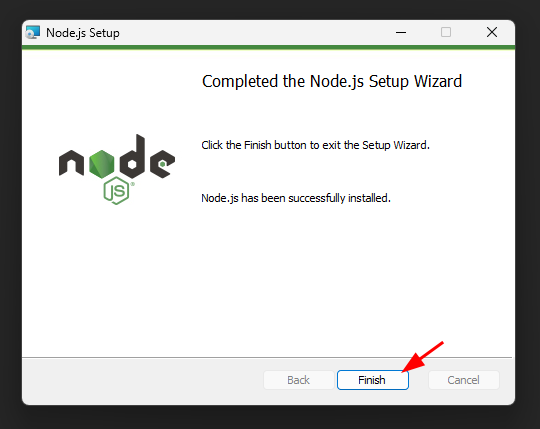
Verify node and npm version
Under Windows PowerShell, run these command:
node --version; npm --version
Install Node-RED
Under Windows PowerShell, run this command:
npm install -g --unsafe-perm node-red
Run Node-RED
Execute the script:
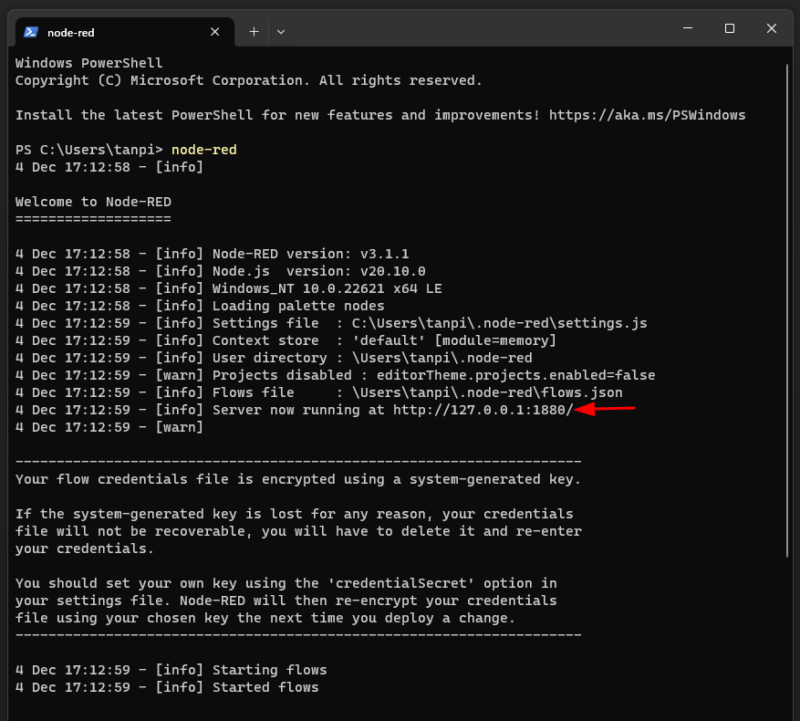
node-redIf the installation completed successfully, you should’ve see the Welcome message from Node-RED. Take note that the server is running on the address http://127.0.0.1:1880. This is also the link to access the Node-RED web portal.
In the case that running script is not allowed due to Windows policy:
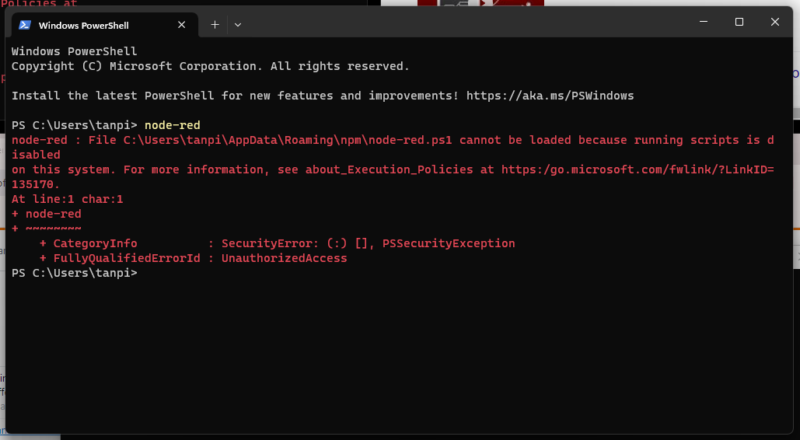
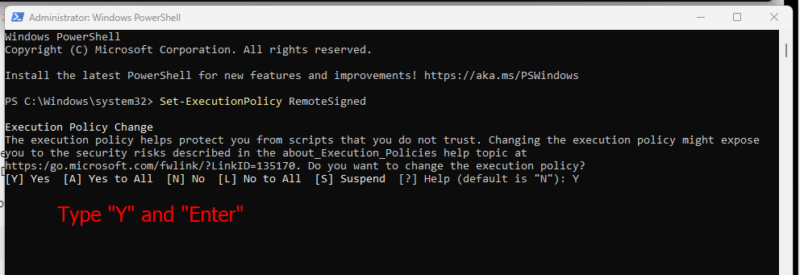
You will need to enable the execution policy. To do that, run a Windows PowerShell as administrator.

Then, run the command below:
Set-ExecutionPolicy RemoteSignedIt will then show a confirmation message and the risk, Type “Y” and then “Enter” to apply the changes. Now, rerun the “node-red” command on PowerShell, and it should be running as normal.
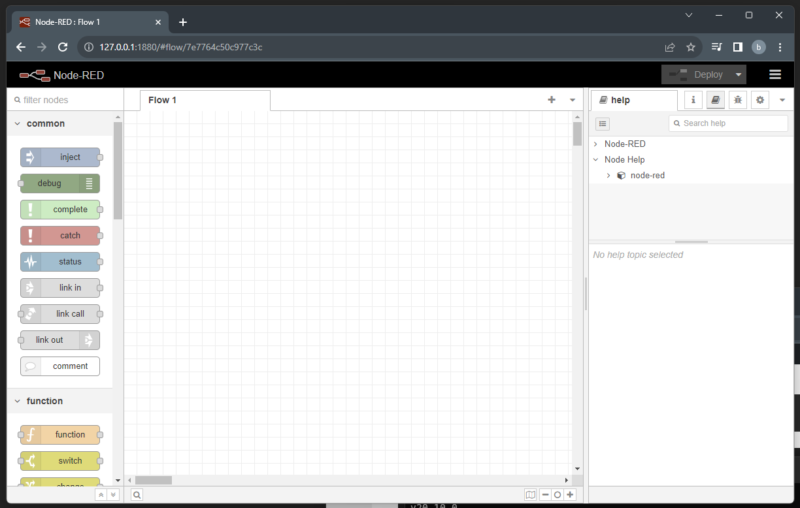
Navigate to the server address http://127.0.0.1:1880 and the web portal for Node-RED should be shown as below. I won’t go through the details about Node-RED here, but there are plenty of guides on how to use Node-RED. If you are completely new, I suggest for you to go through quick intro about Node-RED to understand more on how to use it.
Install node-red-contrib-whatsapp-link
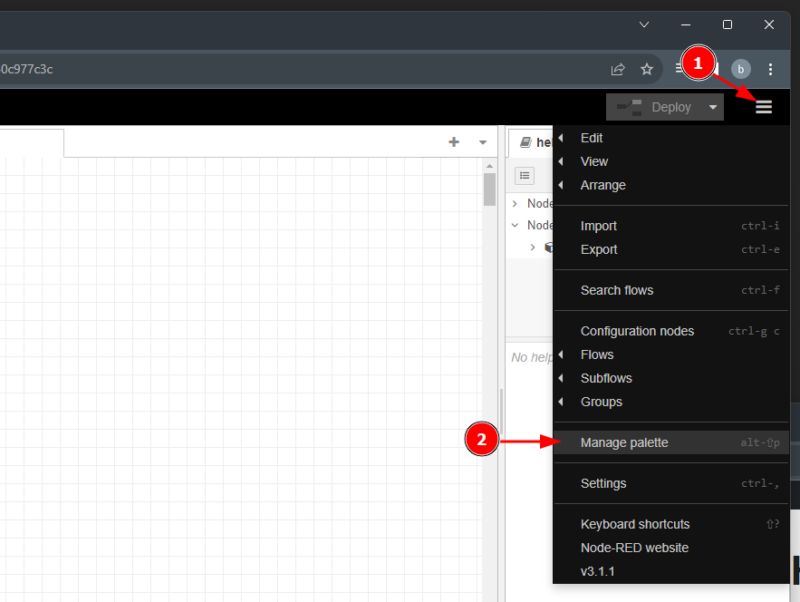
Navigate to Manage pallet menu from the top right corner button.
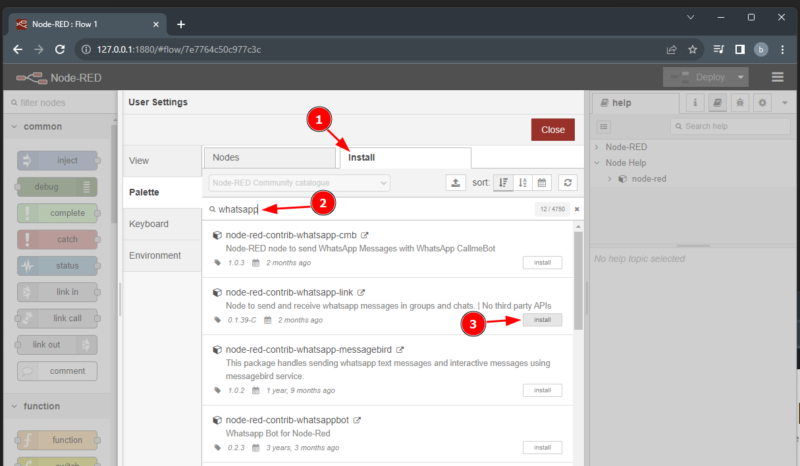
Navigate to Palette > Install and search for “whatsapp”, then click on Install for node-red-contrib-whatsapp-link. Take note that this plugin do have its issues that I’ve shared here. But from my latest testing, they’ve fixed the issue in the updates 2 months ago.
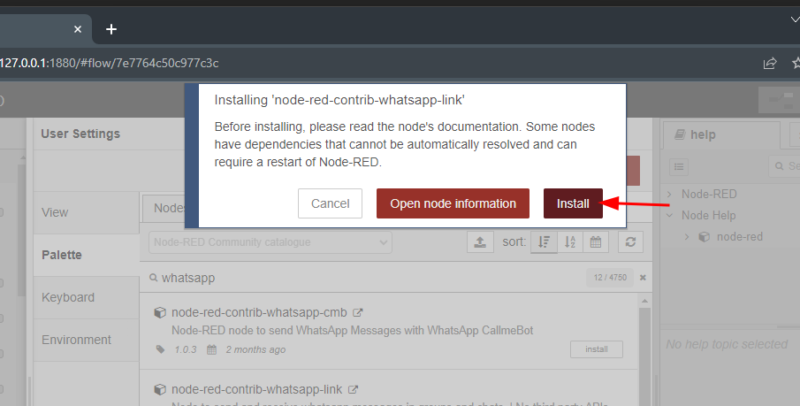
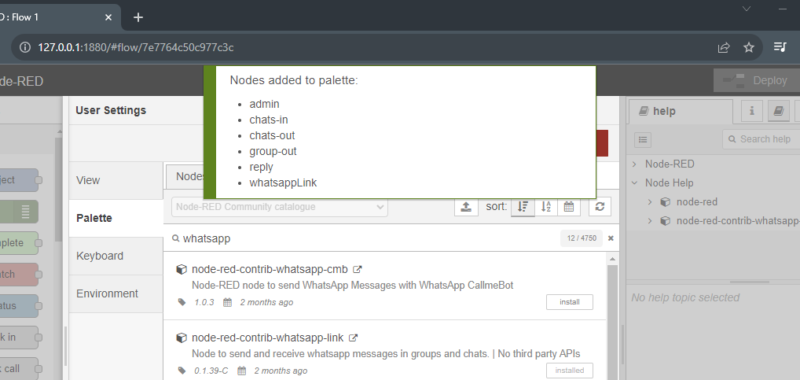
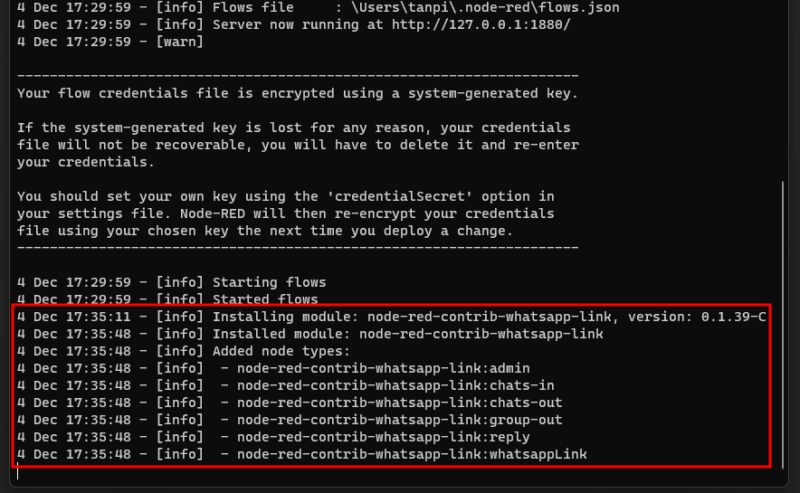
It will take around a minute for the installation, and upon complete, it will pop out a windows saying that the list of Nodes has been added to palette.
Under terminal, you will also see the logs on the installations.
Link Whatsapp Account
After the installation, under your node list, you should have all the new whatsapp nodes.

Add a admin node and a debug node to your Flow, and link them together.

Double click on the WA Admin node under your Flow to access its Properties page. Then click on the Edit button:

Change the client type to Whatsapp Web, uncheck the Checkbox and click Update.

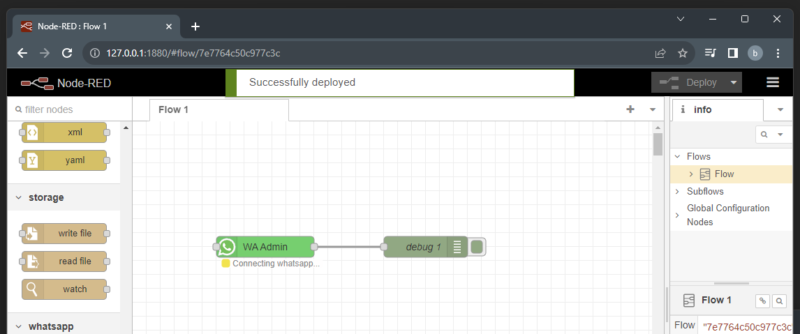
After that click on the Deploy button on the top right corner to apply the changes. If everything goes well, you should see a Successfully deployed message and a QR code showing below the WA Admin node:
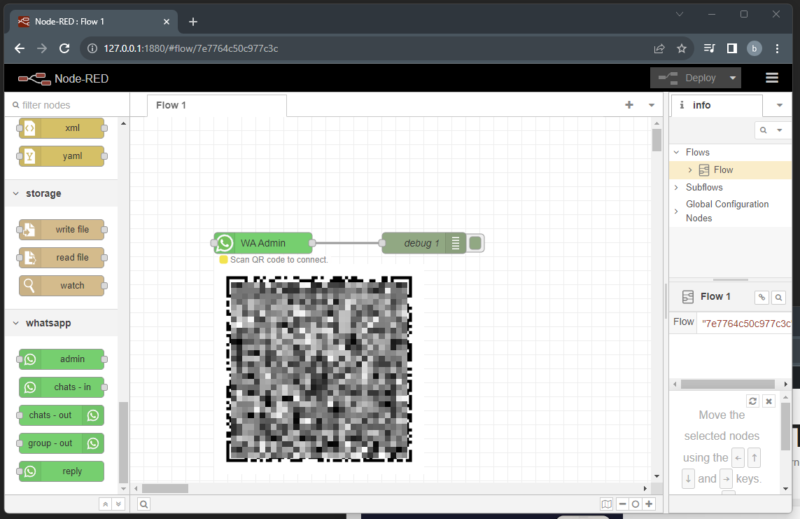
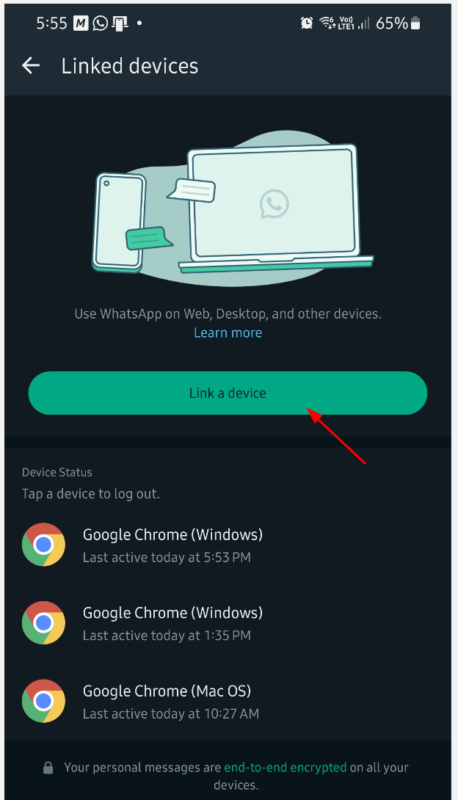
On your phone, head over to Whatsapp application > Linked devices to link this Node-RED to your account. Scan the QR code on the Flow.
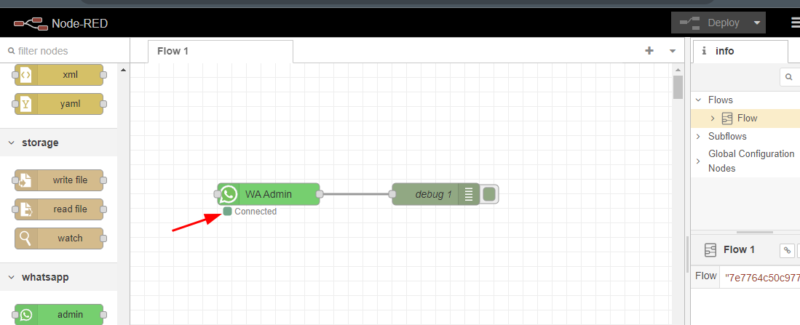
After linking successfully, you should see a Connected message below the WA Admin Button. Under PowerShell, a Whatsapp Connected log is also added.

Send Out Whatsapp Message from Node-Red
The WA Admin node is basically provide function of linking your Whatsapp account to Node-RED. To send a message, you’ll need to use a chats – out node.
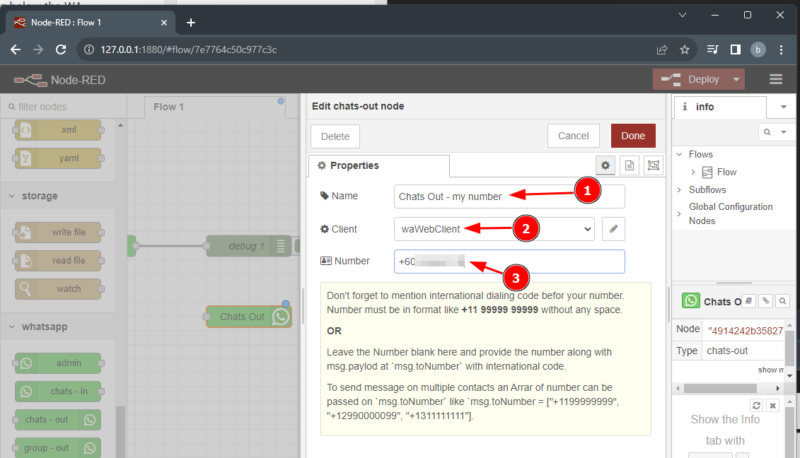
Add the chats – out node to the Flow, and double-click to configure its properties. Edit its Name (name of the node shown in the Flow), make sure it is using the same Client as the WA Admin and insert the phone number that you wanna send out to. In my example, I use my own phone number for this testing. Take note on the requirement for the phone number format explain under the node’s properties page.
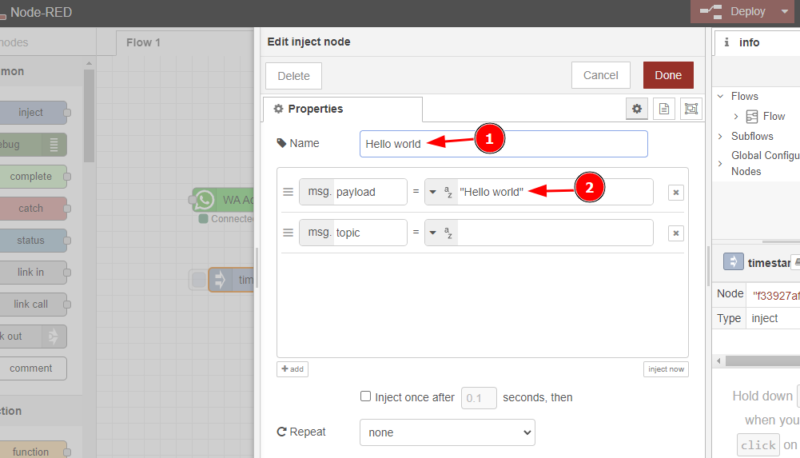
Add a inject node to inject a message to be send. Configure the name, and change the payload type to String, and insert any string to be send out.
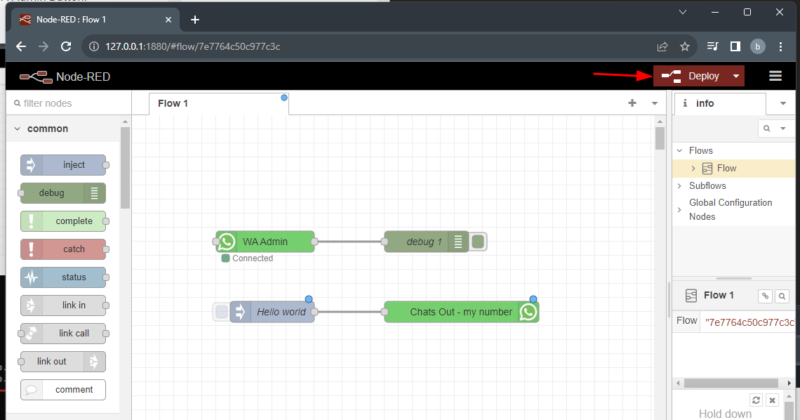
After that’s done, click on Deploy button:
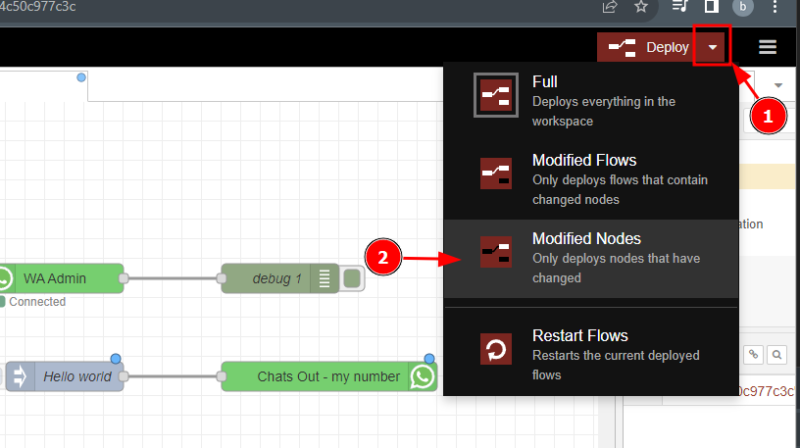
One tips here is, if you don’t need Node-RED to reconnect to Whatsapp server everytime you Deploy the changes, you can configure the Deploy to only deploy the Modified Nodes. This prevent Node-RED to re-connect to whatsapp everytime you click Deploy button.
Click on the dropdown button next to Deploy button and click Modified Nodes. This speed up the Deploy process, and it reduce a lot of wait time.
Now after the deployment completed, trigger the Inject node to send out the “Hello world” message:

In few seconds you should’ve receive this message on your Whatsapp, in my case from myself.
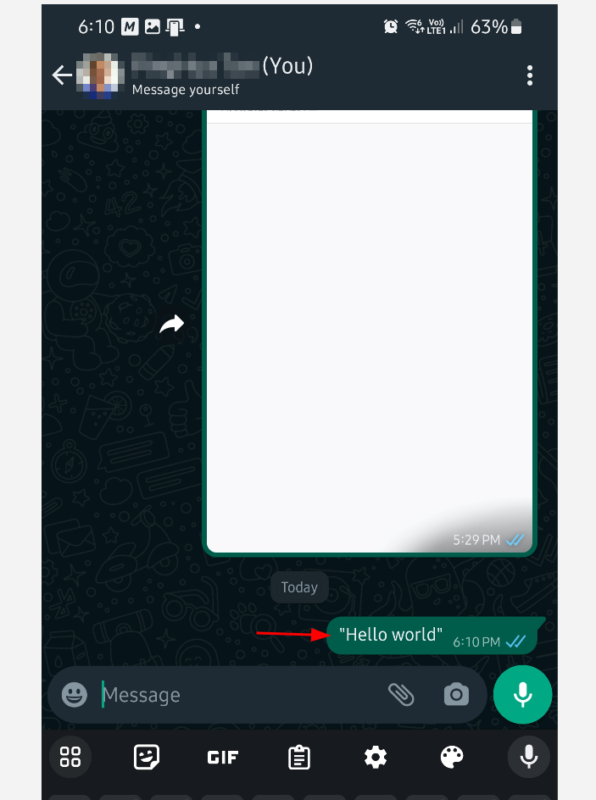
Using this method you can send a message to any number using the Chats Out node.
Receive Whatsapp Message on Node-Red
To receive a Whatsapp Message, add the chats – in node, and double-click to edit its properties. Edit its Name, make sure the client is the same as WA Admin (you should only have one client at the moment), click on Web Event, and select message, and finally click Done. This is to tell the Chats in to listen to the message event. There are other type of events available as well.
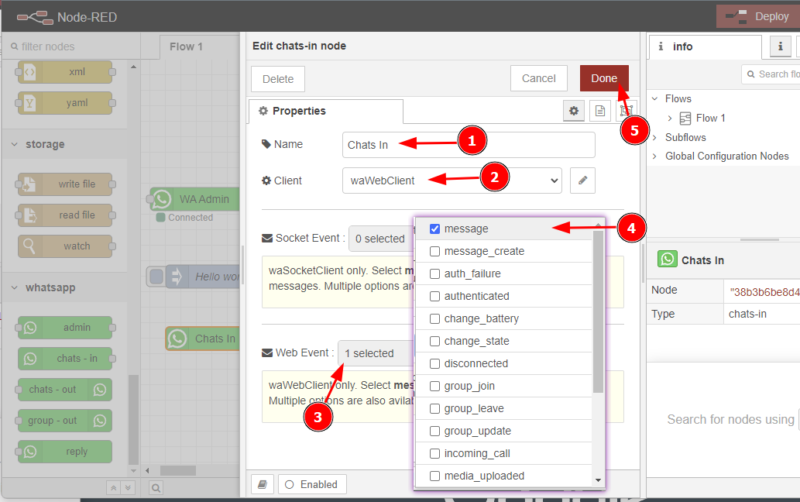
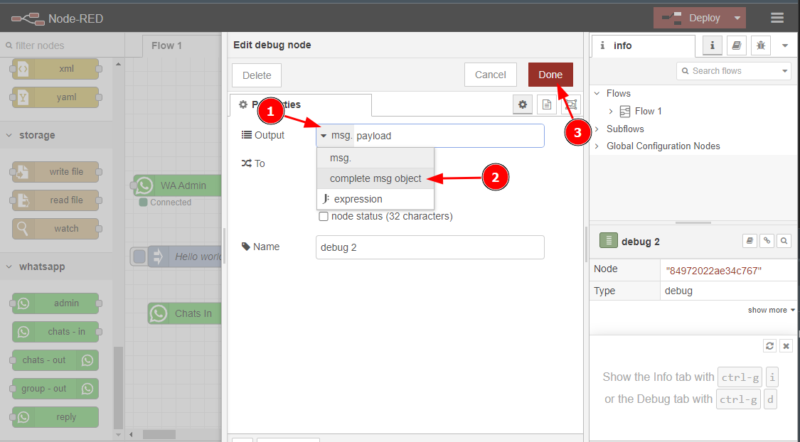
Connect this Chats In node to a debug node. Edit the Debug node to output a complete msg object. This allows more information on the whatsapp incoming message to be shown on the debug.
Deploy the changes as usual:
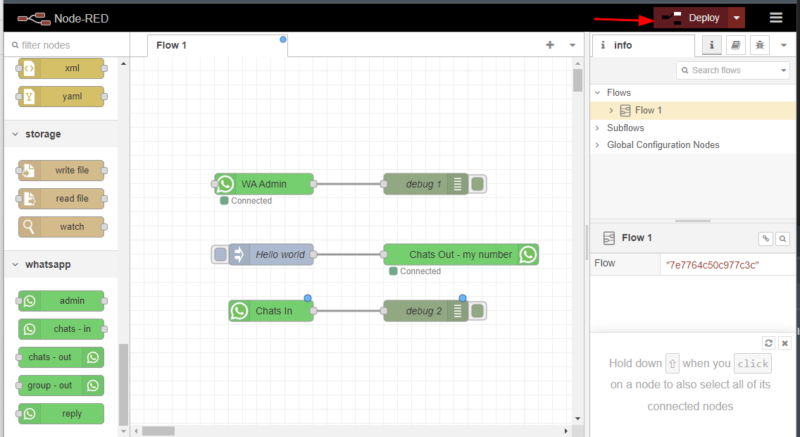
Navigate to Debug panel and clear all previous debug message, and wait for incoming Whatsapp message.

Upon receiving a new message a new item will be added to the list, and you will see the message itself, and also from which number it was sent.
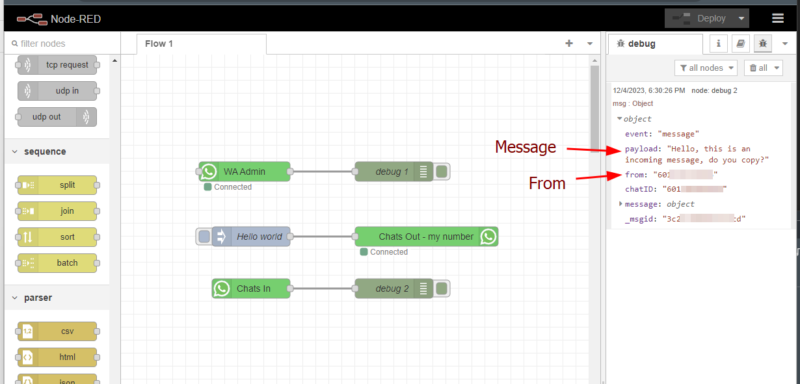
This is how receiving whatsapp message can be done on Node-RED.
I get a fault while installing the node:
“Failed to install…..”
npm error code: ENOENT
npm errorno: -4058
An unknown git error occurred
This is related to npm not being able to find a file.
Please advice how to install the node succesfully..