In this article, we will be discussing how to send and receive email on Node-RED. Having the capability to check email and send out email under Node-RED, it allows customization on email automation on Node-RED. The implementation will be using the node-red plugin, node-red-node-email.
For the installation of Node-RED, please refer to Send and Receive Whatapp Message on Node-RED.
Install node-red-node-email
Navigate to Manage pallet menu from the top right corner button.

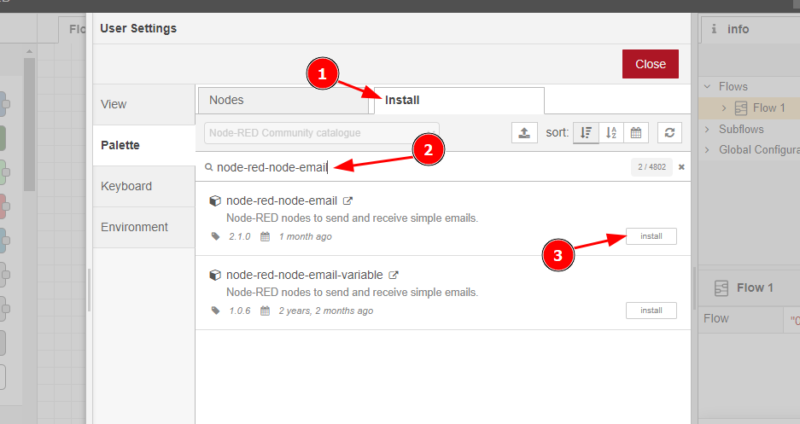
Navigate to Pallete > Install and search for node-red-node-email, then click on Install button to install the plugin.
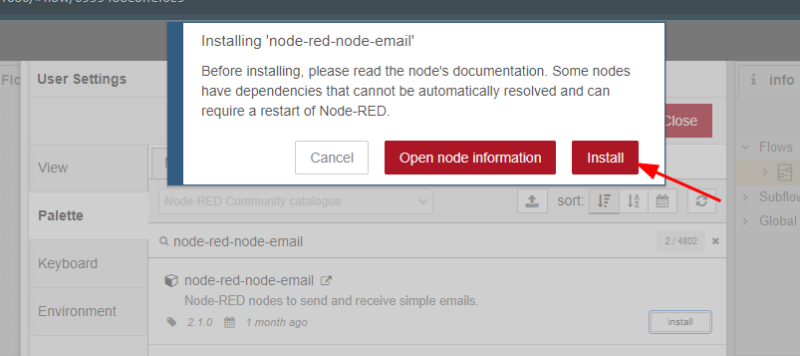
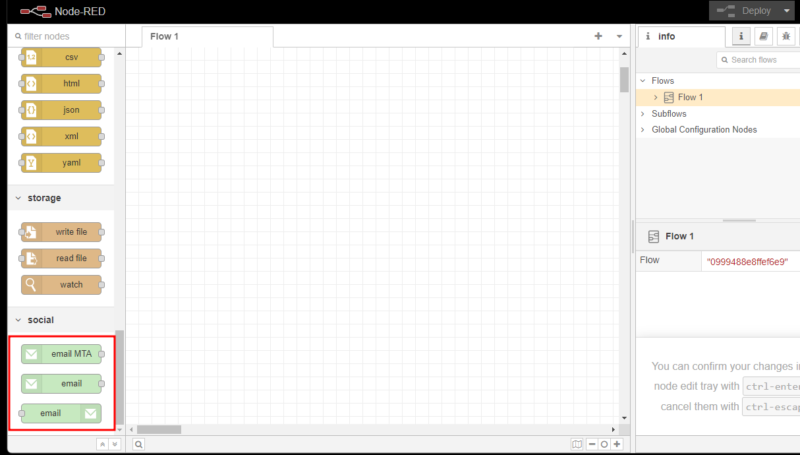
It will take a few minute for the installation, upon completion, you should see addtional node available on the left sidebar of Node-RED interface.
Configure Email Node to Read Your Email
The method that this plugin uses to read your email is by IMAP Protocol, which is fully supported by Gmail. We will be using bustatech@gmail.com email for this example.
Before you start anything on Node-RED side, you will need to first configure your Gmail to generate the App Passwords. For security reason, Google require you to generate an App Passwords if you want to login to your Google account form an application.
Head to your Google Account Setting page, myaccount.google.com. Make sure that you’ve already login to your Gmail account.
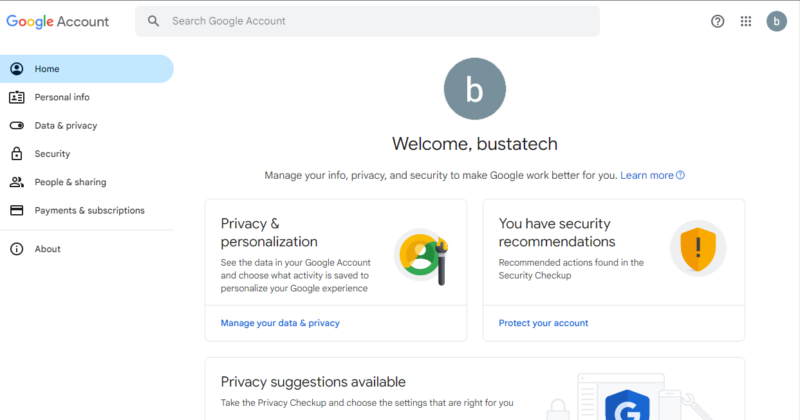
Click on the Security button on the left sidebar, scroll down and click on 2-Step Verification. To generate the App Passwords, you will need to first enable 2-Step Verification, if you have not do so, please follow the on-screen instruction o enable 2-Step Verification.
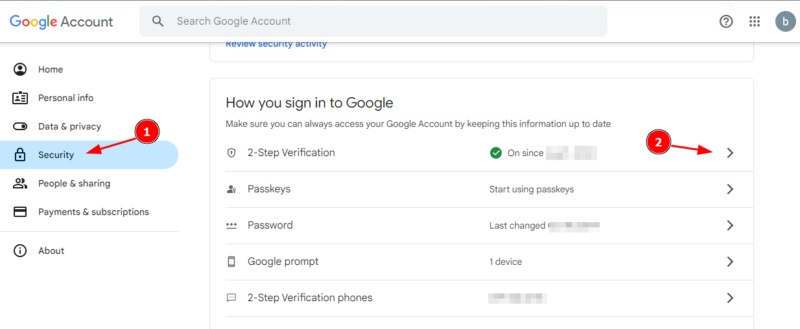
After you’ve turn ON 2-Step Verification, under the same 2-Step Verification page, scroll down to the last section called App passwords. Click on the App passwords arrow key.

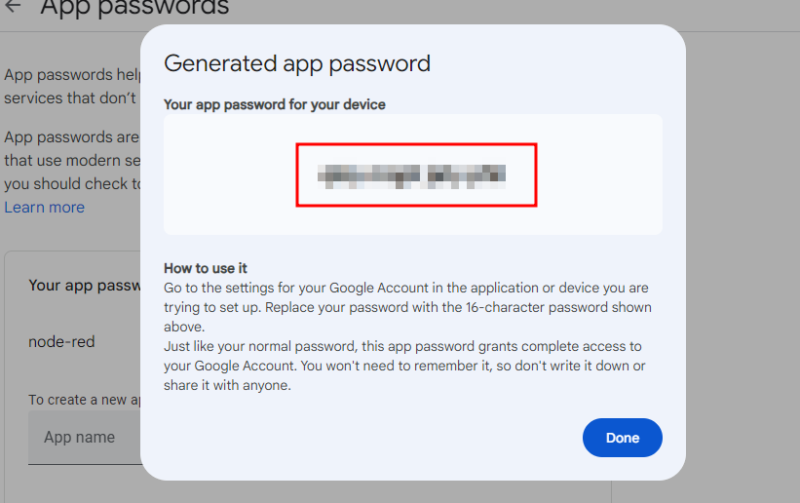
It will then ask for you to type the name of the App. Type in “node-red” and click Create

It will then pop up a windows showing the generated password. Its a 12 digit password and you will need to save this somewhere, as there is no way to view this later. After this step, you are done on the Google Account side.
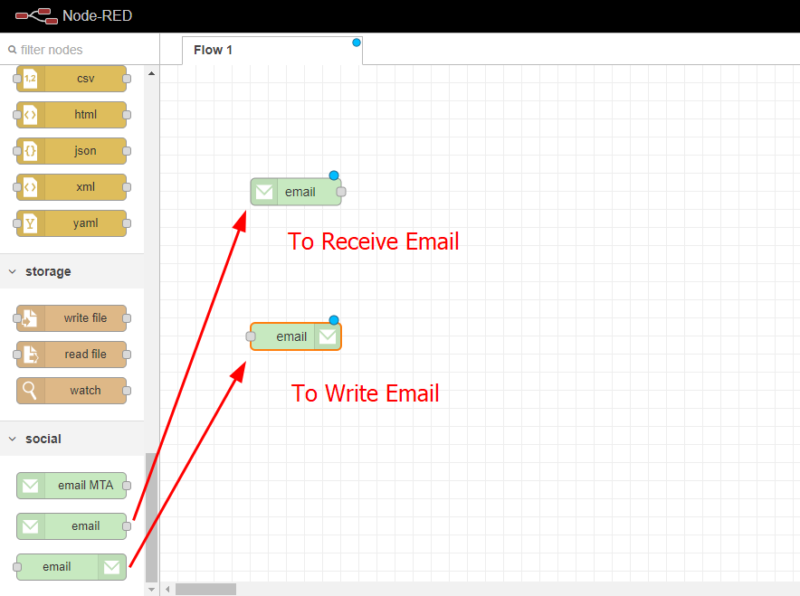
Next, head over to Node-RED interface to add an email nodes. There are 2 types of email nodes, one is to receive email, another one is to send email.
Double click on the email node to configure the node. You can refer to the configuration below:
Receive Email:
For Userid, type the full gmail address. For the Password, use the App Passwords generated in the previous step.
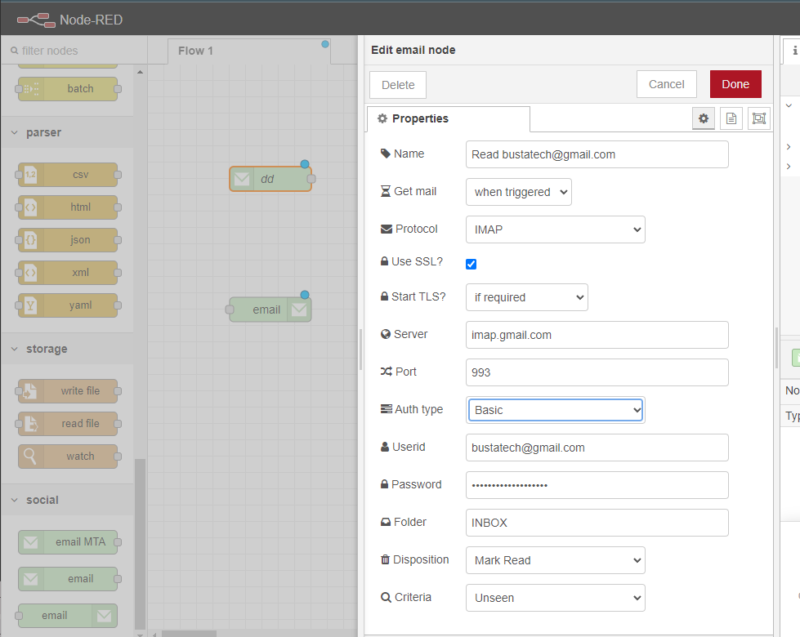
- Name: Title of the Node, this allows you to describe the node for easier flow diagram view
- Get mail: This configuration lets you choose if you want the read email to be triggered from an external flow or triggered automatically by a timer
- Protocol: IMAP, email protocol to use
- USE SSL?: Checked, to use SSL for the communication
- Start TLS?: If required, let system decide
- Server: imap.gmail.com, default for gmail
- Port: 993, default for gmail)
- Auth type: Basic, use this option to use Google App Passwords
- Userid: your email address
- Password: App Password generated in the previous steps
- Folder: INBOX, the folder that this node should read from
- Disposition: Mark Read, after reading the email, Node-RED will mark the email as read, that way it will not re-read the same email next time
- Criteria: Unseen, this node will only read the email that is unread.
Send Email:
Insert the receipient email under To field, in this example, I use the same email for testing purpose. Also for Userid and Password, use your full email address and the App Password generated in the previous steps

- Name: Title of the Node, this allows you to describe the node for easier flow diagram view
- To: the destination email address
- Server: smtp.gmail.com, standard send out protocol for Gmail
- Port: 465, standard port for Gmail
- Use secure connection: Checked
- Auth type: Basic, use this option to use Google App Passwords
- Userid: your email address
- Password: App Password generated in the previous steps
- TLS option: checked, default for Gmail
Read Emails
Now, we can test the Read email node, connect an inject node and debug node to the Read email node:

After deploy the node, click on the inject node to trigger the Read. After the trigger you should’ve seen the notification message below the Read email node. The message I gets there including “connecting”, “fetching”, as the Node-RED connects to Gmail server and fetch the emails.
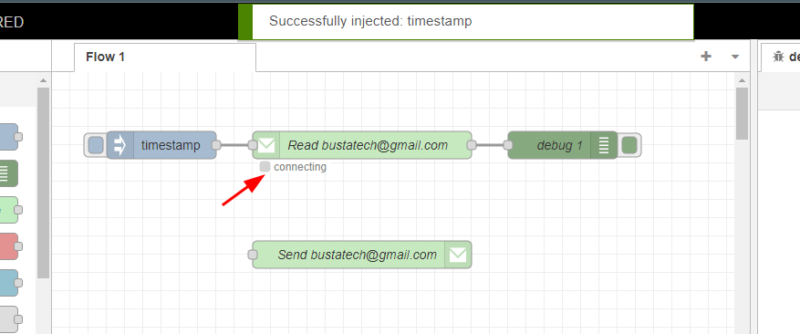
After that, on the debug windows, you should see all your unread email show in the list:

What the Read email node did was, it will fetch all the unread email from your inbox, and sent them out to debug. If you add further process after the Read email, you can decide on what to do next after received any particular emails. The output message from the Read email node includes a msg.topic for the subject of the email and msg.payload for the content of the email
Send Emails
To send out emails, we will need to inject a message to the Send email nodes. Connect an inject node before the Send email nodes, and

Configure the msg.payload and msg.topic of the inject node. the msg.payload is the content of the email to send out, and the msg.topic is the subject of the email.

After deploying the changes click the Inject node and you should see a notification below the Send email node, “sending”.

After a few second you should receive the email in your inbox:


By having the capability to Receive and Send email from Node-RED, you can perform some simple automation for example, to forward an email if the subject of the email matches a certain keywords, or to reply to the sender if the sender send an email to you, and etc.
Thanks for reading and hope you learn something from this article. Thanks.