Why I created OverlayFrame
I recently started using OBS Studio to record and share only part of my screen during video calls. It’s an amazing free tool — you can learn more and download it here: https://obsproject.com.
This setup is especially useful for my large 43-inch 4K monitor. Sharing the entire 4K screen makes text too small for viewers, while sharing only one application window means constant switching when using multiple windows.
However, I ran into one problem — it’s difficult to know exactly which part of the screen is being captured or shared. I searched through OBS settings and online guides but couldn’t find a way to display a simple border marking the capture area.
That’s when I decided to create OverlayFrame — a lightweight tool that displays a configurable on-screen frame, clearly showing the exact area being recorded or streamed. You can easily adjust and save the frame’s position, size, color, and border thickness to match your workflow.
Example use case on 43-inch 4K monitor
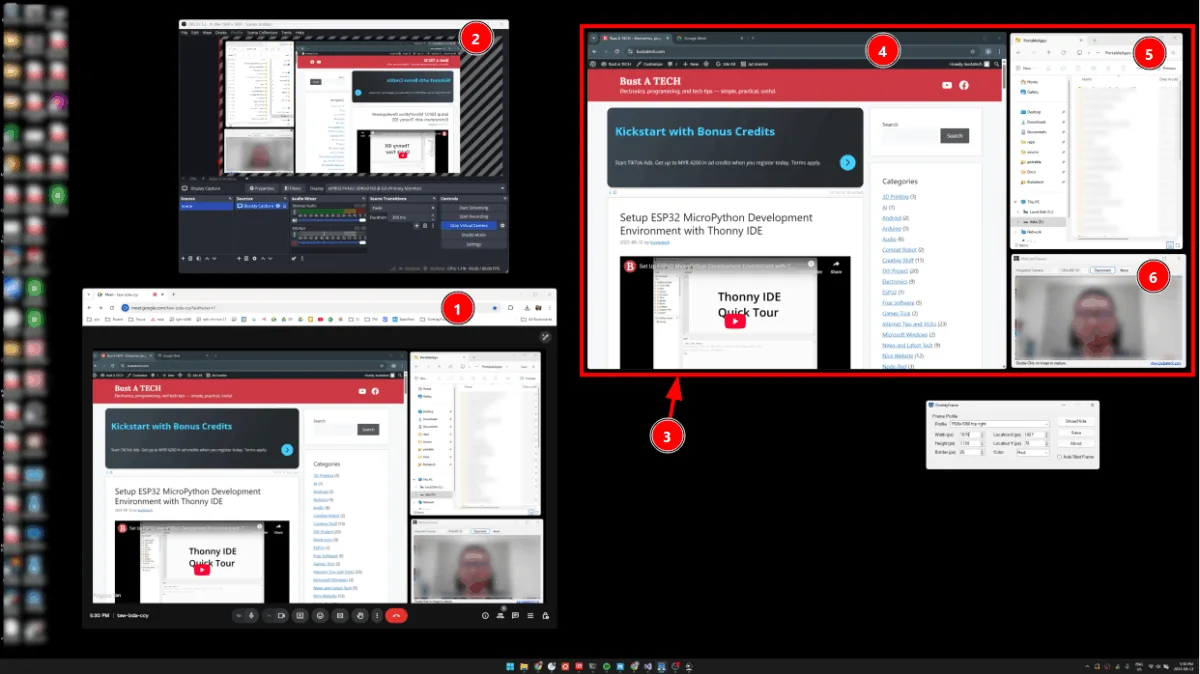
- I start a Google Meet session, using my Virtual Webcam from OBS Studio.
- This is my OBS Studio window, where I’ve set up the scene for Virtual Camera.
- The red frame you see is created by the OverlayFrame application. Its size and position are precisely matched to the capture area in OBS Studio.
- Everything inside this red frame can be seen by my Google Meet audience. I can freely arrange and switch between multiple windows inside the frame without changing my OBS scene.
- My second windows shown inside this red frame.
- I can even run a WebcamViewer to display my real webcam feed within the frame so viewers see both my shared content and my camera.
Application Overview
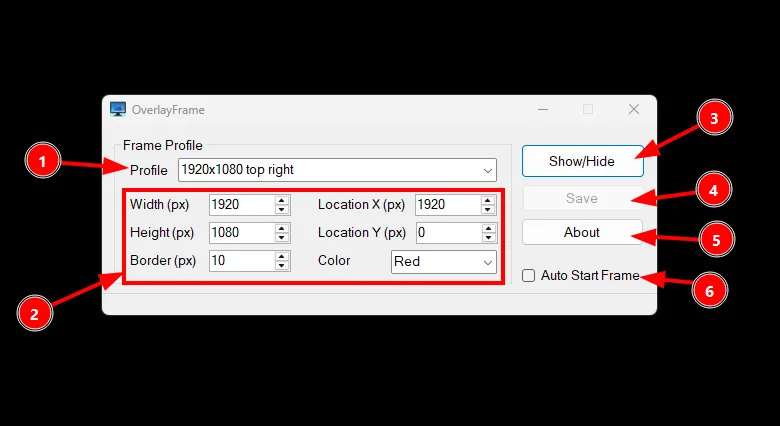
- Profile Selector – Choose an existing profile or type a new name and click Save to create one. Each profile stores frame settings: Width, Height, Location X/Y, Border Thickness, and Color.
- Frame Settings –
- Width & Height: Measured in pixels, relative to your screen resolution.
- Location X/Y: The top-left starting position of the frame.
- Border: Thickness of the frame lines.
- Color: Frame color.
- Show/Hide Button – Instantly toggle the frame visibility.
- Save Button – Stores your changes into
settings.json. - About Button – Opens the About page with application info.
- Auto Start Frame – Automatically show the frame when OverlayFrame launches.
Installation & Usage
OverlayFrame requires no installation. The download package contains just one .exe file. When you run it for the first time, it will create a settings.json file in the same folder — this file stores all your configuration.
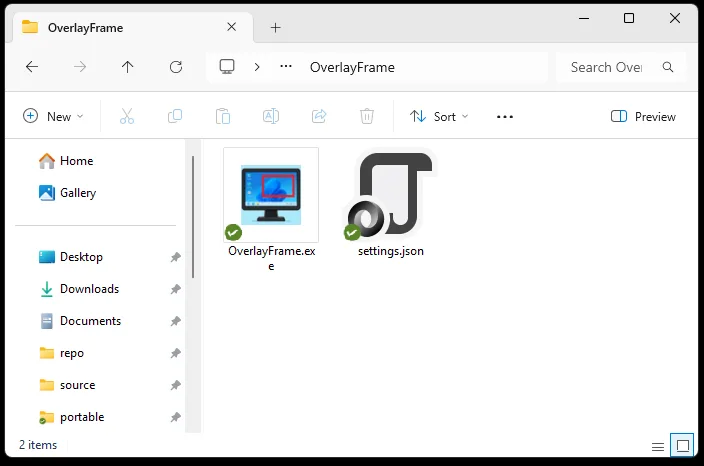
Because it doesn’t create files anywhere else, you can keep OverlayFrame on a USB drive or any folder in your PC. It’s portable, fast, and clean.
OverlayFrame is compatible with Windows 7, Windows 10, and Windows 11 operating systems. To run the application, your system must have .NET Framework version 4.7 or later installed. This ensures smooth performance and full compatibility with all features of the software.
Running Multiple Frames
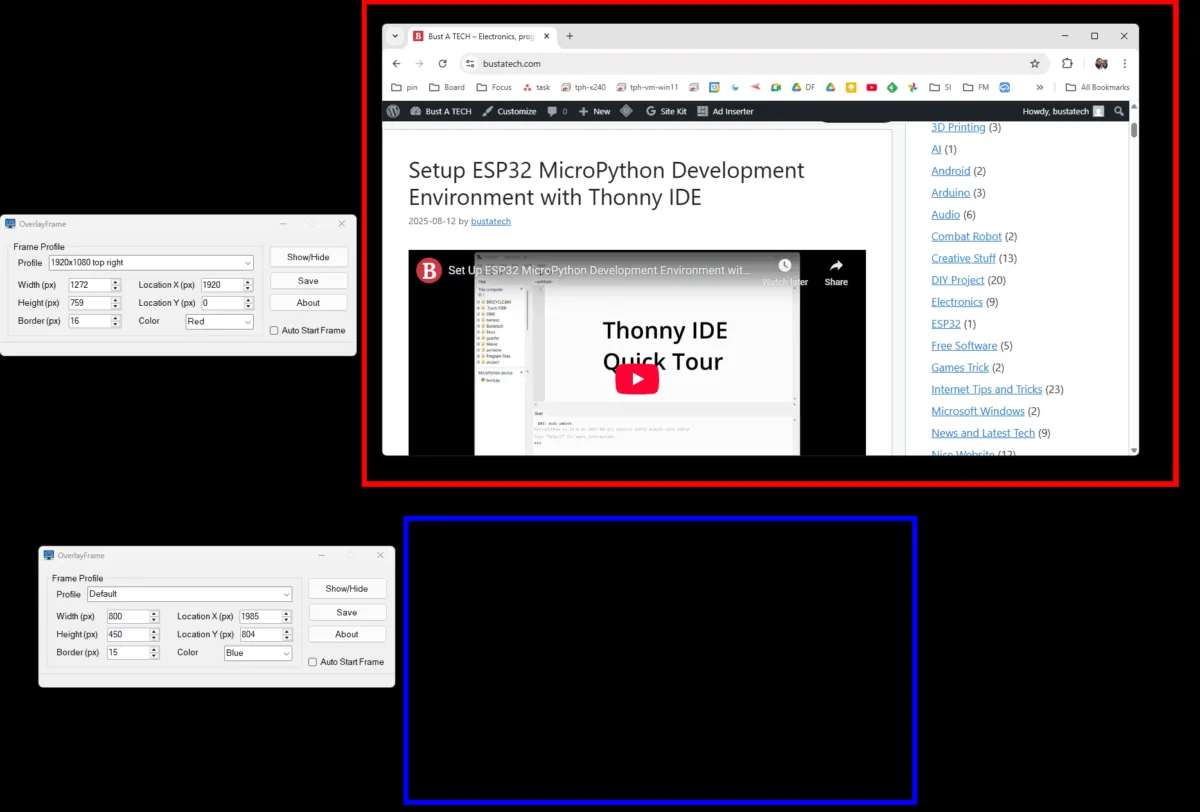
If you need two or more different frames on your desktop, you can run multiple instances of OverlayFrame.
- Each instance is controlled independently.
- All instances share the same
settings.jsonfile, so it’s best to create and save separate profiles for each instance.
OverlayFrame solves the visibility gap for streamers, presenters, and content creators who need to know exactly what part of their screen is being captured. Whether for live streaming, recording, or presentations, it gives you a clear, adjustable, and persistent frame to work with — without getting in your way.
Thank you very much